

Public Wi-Fi seems like a modern convenience gift often connected for free internet at coffee shops, airports, hotels, malls, and even some public parks. You pull out your laptop or phone, connect in seconds, and dive into emails, social media, or quick research. But here’s the uncomfortable truth: without checking and adjusting key settings on your device, using public Wi-Fi can expose your personal data, passwords, financial details, and even your device’s security to hackers lurking nearby.
Key Takeaways:
• Key reasons why you shouldn’t Log into a Public WiFi without ensuring your safety first
• Different Types of ways Cyber Hackers can access your files and steal your sensitive information through WiFi
• Proffesonal Tips on how to secure your WiFi and Protect against Cyber Hackers
In 2026, cyber threats on open networks haven’t vanished; they’ve evolved with better tools for man-in-the-middle (MitM) attacks, rogue hotspots, and data interception. The good news? You can dramatically reduce these risks by proactively reviewing a handful of critical settings before ever tapping “Connect.” This isn’t about paranoia it’s about smart digital hygiene that takes just a few minutes but protects you for years.
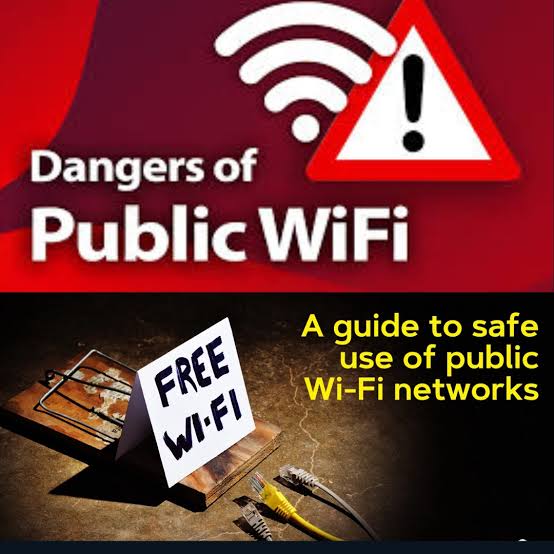
Public WiFi Dangers plus how to safely use public WiFi
This comprehensive guide walks you through exactly which settings to check and tweak on Windows, macOS, Android, and iOS devices. We’ll cover why each matters, how to adjust them step-by-step, and additional best practices to layer on top. By the end, you’ll understand why “Don’t use public WiFi without checking these settings” should become your new travel and daily mantra.
The Hidden Dangers of Public Wi-Fi
Public Wi-Fi networks are inherently risky because they’re shared. Unlike your home router (which you control and often password-protect with strong encryption like WPA3), public hotspots are designed for easy access. Many use weak or no encryption beyond the initial connection, and the network administrator or anyone spoofing the network can potentially see unencrypted traffic.
Common threats include:
- Evil Twin or Rogue Hotspots: Attackers set up fake networks with names like “Free_Cafe_WiFi” or “Airport_Guest” that mimic legitimate ones. Your device might auto-connect, routing all your traffic through the hacker’s equipment.
- Man-in-the-Middle Attacks: A hacker inserts themselves between your device and the internet, intercepting data. Even HTTPS sites offer strong protection today, but sophisticated downgrades or certificate tricks can still pose issues on compromised networks.
- Packet Sniffing and Eavesdropping: On open or poorly secured networks, tools can capture login credentials, browsing history, or session cookies if traffic isn’t fully encrypted end-to-end.
- Malware Injection: Unpatched devices or open sharing features allow attackers to push malicious code.
- Session Hijacking: Stealing active login sessions to access your accounts without passwords.
Real-world incidents continue: Travelers have lost banking access or had identities compromised after casual café sessions. The FTC and cybersecurity experts consistently warn that while widespread HTTPS has improved baseline safety, public networks remain a weak link without additional precautions.
The core problem? Default device settings prioritize convenience over security. Auto-connect, file sharing, and weak firewall profiles make you vulnerable by default. Checking and changing these settings flips the script.
Setting 1: Verify the Network Name and Disable Auto-Connect
Before anything else, confirm you’re joining the Legitimate network. Ask staff for the exact name and SSID spelling. Hackers love “evil twins” with slight variations (e.g., “Starbucks-Guest” vs. “Starbuck-Guest”).

Cyber Hacker – (Representative Photo)
Why it matters: Auto-connect features let your device blindly join known or open networks. A saved public hotspot could reconnect you to a spoofed version later, or your phone might latch onto a malicious signal in a crowded area.
How to check and change:
- On iOS/iPadOS: Go to Settings > Wi-Fi. For any saved network, tap the (i) icon > turn off “Auto-Join.” Consider toggling “Ask to Join Networks” to “Ask” or “Notify” for better control. To forget a network entirely: tap (i) > Forget This Network.
- On Android: Go to Settings > Network & internet > Internet (or Wi-Fi) > Saved networks. Tap a network > Forget. Look for auto-join or auto-connect toggles per network and disable them. Some versions have a global “Auto-connect to open networks” option—turn it off.
- On Windows: Go to Settings > Network & internet > Wi-Fi > Manage known networks. Select public ones and click “Forget.” When connecting manually, ensure you don’t check “Connect automatically.”
- On macOS: Navigate to System Settings > Network > Wi-Fi > Details… for the network > uncheck “Automatically join this network.” Forget via the same menu if needed.
Pro tip: Periodically review and forget all public or travel-related networks. This prevents accidental reconnections months later.
Setting 2: Enable and Configure Your Firewall for Public Profiles
Firewalls block unauthorized incoming connections. On public networks, you want the strictest mode possible to hide your device from others on the same LAN.

Cyber Hackers are increasingly using Public WiFi networks to access sensitive information from unsuspecting Victims
Why it matters: Without a proper firewall, other users (or attackers) might probe open ports for file sharing, printers, or vulnerabilities. Public profiles in Windows, for example, are designed to be restrictive by default—but only if enabled.
How to adjust:
- Windows: Open Windows Security > Firewall & network protection. Ensure Microsoft Defender Firewall is On for the “Public network” profile. Under Advanced settings, confirm inbound connections are blocked except for essential services. Set the network location to “Public” when connecting (Windows often prompts this).
- macOS: Go to System Settings > Network > Firewall. Turn it On. Enable “Block all incoming connections” for maximum security on public Wi-Fi (you can allow specific apps later). Stealth mode hides your Mac from ping scans.
- Android/iOS: Mobile OS’es have built-in protections, but enable any “Private DNS” or firewall apps from trusted sources (e.g., via Google Play Protect). iOS is generally locked down, but avoid jailbroken devices.
Test your firewall: Sites like ShieldsUP! (grc.com) can scan for open ports when connected.
Setting 3: Turn Off File Sharing, AirDrop, and Discovery Features
Sharing features broadcast your device’s presence and allow easy access to folders or printers.
Why it matters: On a public network, an attacker could exploit open shares to access files or inject malware. Features like Windows File and Printer Sharing or macOS AirDrop become attack vectors in shared environments.
How to disable:
- Windows: Enter Settings > Network & internet > Advanced network settings > Advanced sharing settings. Turn off “File and printer sharing” for Public networks. Also disable Network discovery.
- macOS: Go to System Settings > General > Sharing. Turn off all sharing options (File Sharing, Printer Sharing, AirDrop, etc.) while on public Wi-Fi. You can re-enable later.
- Android: Go to Settings > Connected devices or Bluetooth & device connection > turn off Nearby Share or equivalent.
- iOS: Enter Control Center > disable AirDrop (set to Contacts Only or Receiving Off). Also turn off Personal Hotspot if not needed.
A Personal advice to You! make this a habit: Create a “Public Wi-Fi” shortcut or routine on your phone if supported, or simply toggle these off manually before connecting.
Setting 4: Force HTTPS Everywhere and Check Certificates
Most modern sites use HTTPS, which encrypts data between your browser and the server. But you must verify it.
Why it matters: On public Wi-Fi, HTTP sites send data in plain text. Even HTTPS can face downgrade attacks if the site doesn’t enforce it strictly (via HSTS). Always look for the padlock icon and “https://” in the address bar. Click the lock to inspect the certificate to ensure it’s issued by a trusted authority and matches the domain.
Actions:
- Use browsers like Chrome, Firefox, or Safari with “HTTPS-First” or “Always use HTTPS” extensions enabled.
- Install HTTPS Everywhere (or equivalent) if available.
- Avoid entering sensitive info on any non-HTTPS site.
- For apps, assume most banking/email apps use encryption, but verify in settings where possible.
If a site forces HTTP or shows certificate warnings, disconnect immediately.
Setting 5: Use a VPN—Your Strongest Layer of Protection
A Virtual Private Network (VPN) encrypts all your traffic through a secure tunnel to a remote server, hiding it from the local network operator and potential sniffers.
Why it matters: Even on a legitimate public Wi-Fi with WPA2/WPA3, the network owner or MitM attacker can see destinations and unencrypted payloads. A good VPN makes your connection private, masks your IP, and prevents most interception. Experts universally recommend it for public networks.
How to set it up:
- Choose a reputable no-logs VPN (e.g., those with WireGuard or strong protocols, kill switch, and leak protection).
- Install the app and configure it to auto-connect on untrusted networks if possible.
- Connect to the VPN before joining public Wi-Fi or immediately after, but preferably before any activity.
- Enable features like split-tunneling only for trusted apps, and always use the kill switch to block traffic if the VPN drops.

WiFi Safety is must for all
On mobile, many VPNs integrate with always-on modes. Test for DNS leaks using sites like ipleak.net.
Personal Pro-Tip: Free VPNs can be risky—some log data or inject ads. Paid services from established providers are safer.
Additional Critical Settings and Best Practices
- Update Everything: Ensure your OS, apps, and browser are fully patched. Vulnerabilities in outdated software are prime targets on public networks.
- Use Mobile Data When Possible: For sensitive tasks (banking, shopping), switch to cellular data with its own encryption.
- Enable Multi-Factor Authentication (MFA): Even if credentials are compromised, a second factor (app-based or hardware key) blocks access. Avoid SMS if possible due to SIM-swapping risks.
- Turn Off Bluetooth and Wi-Fi When Not in Use: Reduces attack surface from nearby devices.
- Avoid Sensitive Activities: Skip online banking, entering credit cards, or accessing work VPNs without protection. Use incognito or private browsing for casual tasks.
- Forget Networks After Use: After leaving a location, go back to Wi-Fi settings and forget the network to prevent future auto-joins.
- Read Terms on Captive Portals: Some public Wi-Fi requires login pages—review them, but don’t assume they’re secure.
For advanced users: Consider DNS over HTTPS (DoH) in browser settings for extra privacy, and monitor connected devices via your router apps when at home.
Platform-Specific Quick Checklists
iPhone/iPad:
- Disable Auto-Join and forget public networks.
- Turn off AirDrop and sharing.
- Enable Firewall via third-party if needed (iOS is restrictive by default).
- Use VPN app with auto-connect.
- Check for iOS updates.
Android:
- Manage saved networks and disable auto-connect.
- Turn off Nearby Share.
- Enable Private DNS (Settings > Network > Private DNS > Automatic or a secure provider).
- Activate VPN.
- Use Google Play Protect for malware scanning.
Windows Laptop:
- Forget networks + set to Public profile.
- Enable strict Firewall for Public.
- Disable file/printer sharing.
- Run Windows Update.
- VPN always on for public.
Mac:
- Forget networks + disable auto-join.
- Enable Firewall with block all incoming.
- Turn off all Sharing services.
- Keep macOS updated.
- VPN with kill switch.
Real-World Scenario: A Day Protected
Imagine arriving at an airport. You:
- Disable auto-connect and Bluetooth en route.
- Ask staff for the exact Wi-Fi name.
- Connect manually, confirm Public profile/firewall.
- Fire up your VPN before opening any app.
- Check HTTPS on every site.
- Do light browsing only—no banking.
- Forget the network before boarding.
This routine becomes second nature and prevents 99% of common threats.
Why These Settings Matter More Than Ever in 2026
With remote work, travel rebounding, and IoT devices everywhere, public Wi-Fi usage is higher than ever. Attack tools are cheaper and more accessible via apps and scripts. But device makers have improved defaults—firewalls, automatic HTTPS enforcement, and better encryption help. The gap remains in user-configured settings.
Ignoring these checks isn’t just risky for you; it can expose linked accounts or even corporate data if you’re working remotely.
My Final Thoughts: Convenience vs. Security
Public Wi-Fi will always be tempting, but blind trust is dangerous. By spending 2-3 minutes checking and adjusting these key settings—network verification, auto-connect, firewall, sharing features, HTTPS vigilance, and especially VPN—you transform a potential vulnerability into a manageable convenience.
Make a checklist on your phone or in a note app. Teach family members. For frequent travelers, invest in a reliable VPN subscription and consider a portable hotspot with its own secure cellular connection as a backup.
Stay vigilant, stay updated, and remember: the internet doesn’t owe you safety—you enforce it through informed settings and habits. Your data, privacy, and peace of mind are worth the small effort.
Safe surfing out there.


Leave a Reply